Best Practices
The key to mastering Heatseeker™ is to use it as context, not as a signal generator.Each node represents a story of positioning, not a direct “buy here / sell here” instruction.
1. Use Nodes as Context — Not Signals
- Treat each node as a level of interest, not a trade trigger.
- Let price action confirm your setups — Heatseeker™ is a lens, not an entry system.
-
A node’s significance depends on how price reacts to it, not just its size.
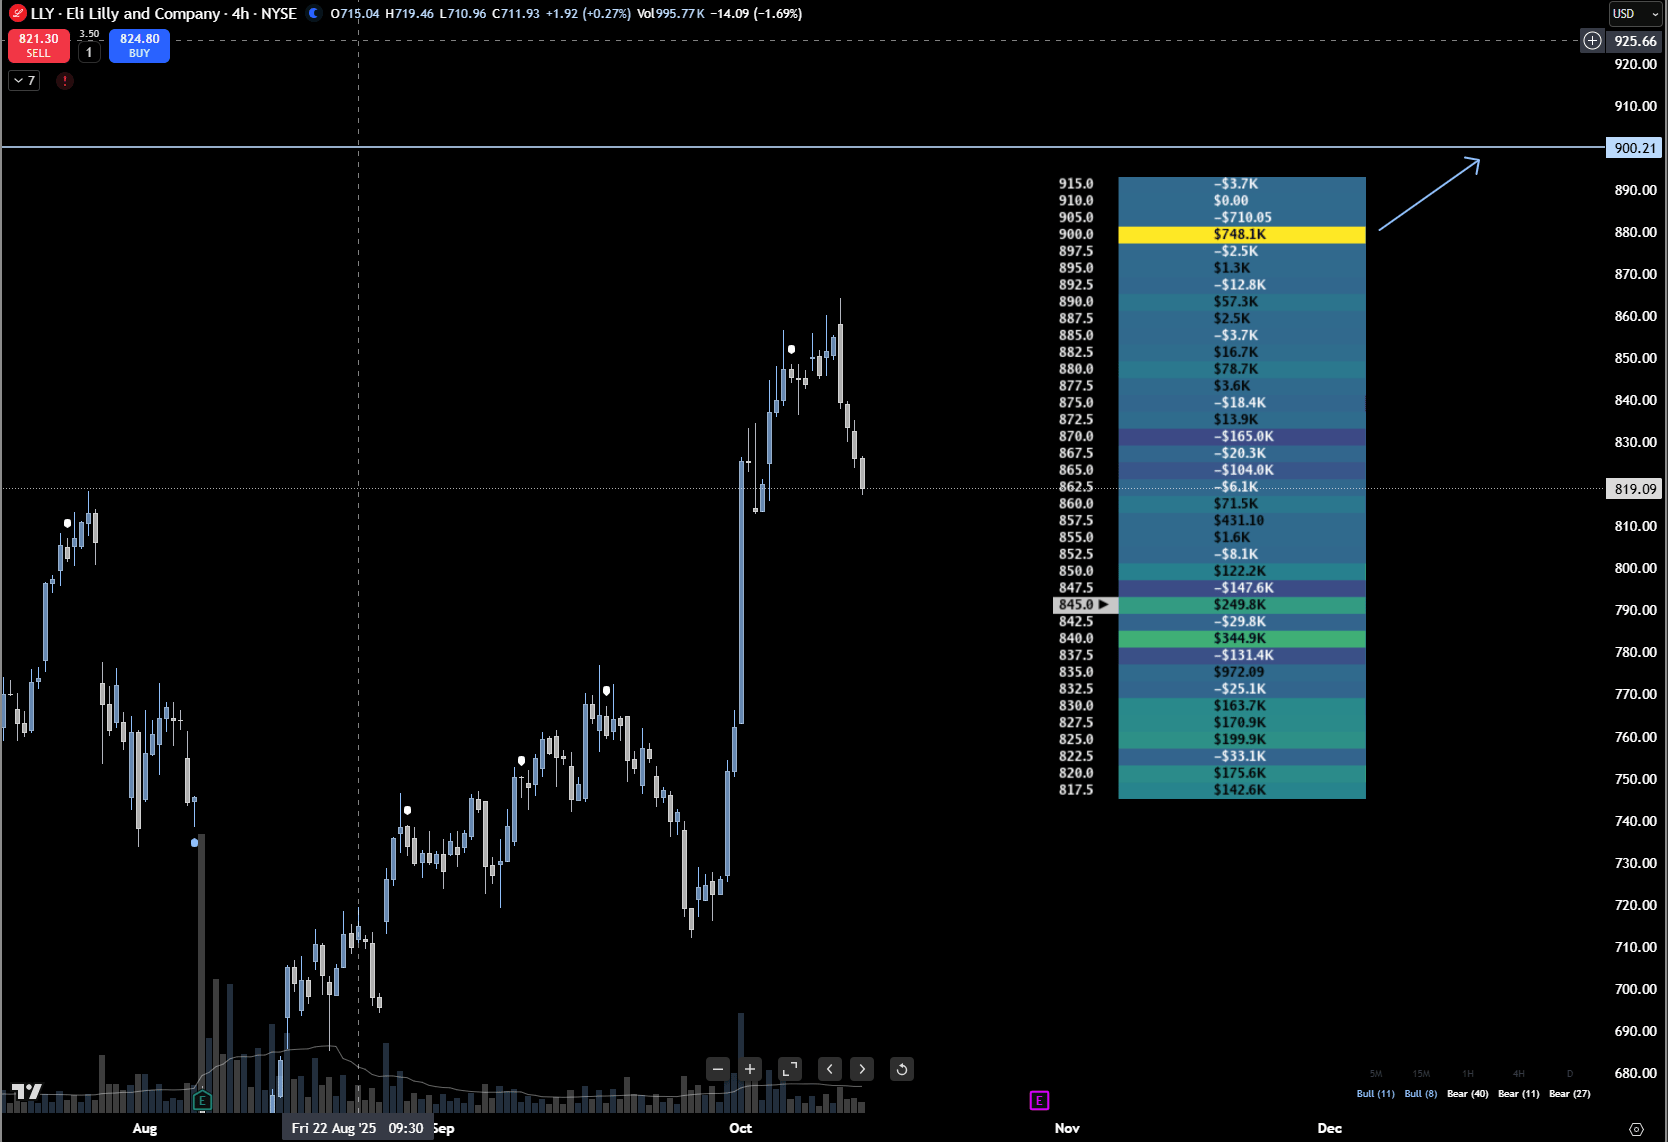
- Example: LLY for the week of October 6th, 2025 showed a king node at $900, but had already had a massive leg up. The probability that this 900 node will get hit is much less because of the massive upside rally that had already occurred.
Think of Heatseeker™ as your map — price action is the compass.
2. Stay Fluid, Not Biased
- Don’t anchor to a single bullish or bearish thesis.
- Be flexible — if the map reshuffles, adapt to it.
- Stubborn bias leads to drawdowns; flexibility keeps you aligned with market makers.
Discipline > conviction. You’re reading flow, not fighting it.
3. Focus on Asymmetric Risk-to-Reward
Your objective is not to be right more often — it’s to win bigger when you’re right and lose smaller when you’re wrong.- Prioritize setups with clear asymmetric R:R.
- If risk and reward are close to 1:1, skip the trade — there’s no edge.
- Focus on edges of ranges and deflection points, where the payoff potential is greatest.
Winning traders think in ratios, not in win rates.
4. Don’t Fight the Map
- When the heatmap reshuffles, the market structure has changed.
- Don’t cling to old levels — pause, observe, and re-evaluate.
- The best trades come from waiting for clarity, not forcing trades through uncertainty.
“When in doubt, zoom out.”
A new map = new game.
5. Combine GEX and VEX for Confirmation
One of the most powerful confirmations in Heatseeker™ comes from GEX/VEX confluence —when both forces align around the same price zone.
Why It Matters:
- When GEX and VEX overlap, that zone carries stronger influence on price.
- These alignments increase the odds of holding or reversing at that level.
- Works exceptionally well for swing trades and intra-day fades.
How to Trade It:
- Watch for bounce setups forming at a GEX/VEX overlap zone.
- Treat these as zones of interest, not precise levels.
- Use price confirmation before entering.
Confluence = Confidence.
The more alignment between GEX, VEX, and price action, the higher your probability of success.
6. Look for Confluence Among the Indices
- Magic happens when heatmaps line up.
- The highest probability plays occur when SPX, SPY and QQQ are all in agreement for a major reversal.
- Ask Yourself: “If I were to take a trade based off SPX heatmap, would my thesis still hold true if I took it on QQQ instead?”
Why It matters:
- A floor on SPX can prevent a rug on QQQ just as much as a ceiling on SPY can prevent a rally on SPX.
- A significant king node on SPY to the downside can cause whippy rejections of key nodes even if massive upside nodes exist on SPX and QQQ.
Quick Recap
| Practice | Focus | Benefit |
|---|---|---|
| Nodes as Context | Use as levels of interest | Avoid overtrading noise |
| Stay Fluid | Adapt to map reshuffles | Stay aligned with flow |
| Asymmetric R:R | Focus on edges | Maximize edge potential |
| Don’t Fight the Map | Wait for clarity | Avoid false reversals |
| GEX/VEX Confluence | Dual-layer confirmation | Boost probability & conviction |
| SPY/SPX/QQQ Confluence | Triple-layer confirmation | Highest probability outcomes |
Final Thought:
Heatseeker™ gives you visibility into dealer positioning — but discipline, timing, and patience make the tool powerful.
The map shows the structure, but you decide when to act.